Tutorial-Hot Chocolate Wallet (Christmas Wrap-up #5)

Hot Chocolate Wallet-A Free Tutorial from Everything Pudding, Use up your fabric scraps with this easy wallet that holds four hot chocolate mix packets and is perfect for travel or a camping trip

We’re down to the last Christmas Wrap-up post and this time I’ve got another free tutorial for you, a Hot Chocolate Wallet. This wallet is designed to hold 4 hot chocolate mix packets. You could use this when you’re going on a camping trip or visiting friends to ensure that you always have your favorite hot chocolate mix with you.

Hot Chocolate Wallet-A Free Tutorial from Everything Pudding, Use up your fabric scraps with this easy wallet that holds four hot chocolate mix packets and is perfect for travel or a camping trip

This is a really easy project to make and is great for using up small pieces of leftover fabric. I’ve already made three of these using leftover fabric so I’m starting to make a dent into my large stash. I made my first one in order to figure out whether the idea I had in my head would work out exactly as I thought it would. I picked this cute flower pattern to use for my first go and it worked out really well. I didn’t have to change anything when I went and made the next two that I gave as Christmas gifts.

Hot Chocolate Wallet-A Free Tutorial from Everything Pudding, Use up your fabric scraps with this easy wallet that holds four hot chocolate mix packets and is perfect for travel or a camping trip

So now it’s your turn. Download the tutorial here: Hot Chocolate Wallet Tutorial and start sewing!

As always, this tutorial is for personal use only. You may not reproduce this and you may not make items from this tutorial to sell. Thanks for respecting my hard work!

Project-Hand Sanitizer Jacket (Christmas Wrap-up #4)

Hand Sanitizer Jacket-Dress this necessity in it's very own pretty jacket Find out more from Everything Pudding

I’m getting down to the end of my Christmas Wrap-up posts. Only one more post (with a new tutorial) after this one. Today I’m sharing with you the hand sanitizer jacket I made based on a tutorial by The Inspired Wren which you can also download for free from Craftsy. It’s a practical project and is also great for using up scraps. I’ve already got plans to make some more of these to use up some of my large remnant stash.

Hand Sanitizer Jacket-Find out more from Everything Pudding

The original tutorial called for a 2 oz. bottle of hand sanitizer. However, when I went to Walmart they only had 2.5 oz. bottles. You can see the difference in size between the one I got (on right) and a 2 oz. bottle my sister had. Because of the size difference I made my fabric pieces slightly bigger than called for in the tutorial.

Hand Sanitizer Jacket-Find out more from Everything Pudding

I made a number of changes to the materials I used due to what I had on hand and due to the larger size bottle. Below is a breakdown of the difference with the original materials called for in parentheses:

What I Used
(What It Called For)

2.5 oz. bottle of Hand Sanitizer
(2 oz. bottle of Hand Sanitizer)

2 – 2 3/4″ x 10 1/2″ piece of lightweight fabric
(2 – 2 1/2″ x 10″ pieces of indoor/outdoor canvas)

2 – 2 3/4″ x 10 1/2″ piece of medium-weight interfacing – additional interfacing used to strengthen the fabric since it was a lighter weight fabric
(2 1/2″ x 10″ piece of medium-weight Interfacing)

5 1/4″ x 3″ lightweight fabric – for handle, see method used below
3″ of 3/4″ elastic – for belt
(8″ of 3/4″ fold-over elastic – for the elastic belt and the elastic handle)

5/8″ button – without a shank
(1/2″-3/4″ button – preferably with a shank)

Handle

As mentioned above, the tutorial originally called for a handle made using elastic (specifically she used fold-over elastic). I really liked the look of the fold-over elastic used as a handle however decided not to do this because I didn’t have any on hand and because fold-over elastic stretches out really easily so being used as the handle for the jacket meant it would probably stretch out over time. Instead I used a piece of fabric. I’m sure you’re probably familiar with this way of making handles/straps, but I’ll just quickly brief you on the way I did mine.

Hand Sanitizer Jacket-Find out more from Everything Pudding

  1. Fold piece of fabric in half, press.
  2. Unfold and fold both sides into the middle, press.
  3. Unfold and fold down 1/4″ on one end (so that you have a finished edge), fold along middle crease, and press.
  4. Sew all the way around to make one large rectangle (sewing the bottom edge isn’t necessary but I decided to do it anyway).
  5. Insert buttonhole following tutorial’s instructions. I did find that I had trouble doing the button hole because there was nothing which I could hold onto to “feed” it through my machine. It took me several tries but I finally figured out that I had to do the buttonhole slightly farther from the end than called for (it was still long enough and didn’t cause a problem) and I stuck pins into both side of the end of the piece so I could push the fabric through when it got caught while making the buttonhole.

This project did take me longer than I thought it would. This was due to the fact that I used some different materials (required more time to figure out what to use and cut out fabric) and that I had to redo the two different buttonholes several times. But I finally finished it, it turned out well, and best of all the recipient, my little sister, really liked it.

There are only two things that I plan on doing differently next time I make these.

  1. Find a 2 oz. bottle. The 2.5 oz bottle was oddly shaped and seemed large, while the 2 oz. bottle my sister had was better shaped and slightly smaller. (Note: If you end up using a 2.5 oz bottle I would alter it like I did but instead of 10 1/2″ long piece which is what I originally did, I would make them 11″ long. It was a little tight lengthwise.)
  2. Use coordinating fold over elastic for the elastic belt (didn’t have any on hand, otherwise I would’ve used it originally).

Hand Sanitizer Jacket-Find out more from Everything Pudding

This project is great for using up little scraps, and once you’ve mastered the art of buttonholes, shouldn’t take you too much time. So grab some fabric from your stash, pick up the tutorial from The Inspired Wren on Craftsy, and start sewing!

Project-Compact Groceries Tote (Christmas Wrap-up #3)

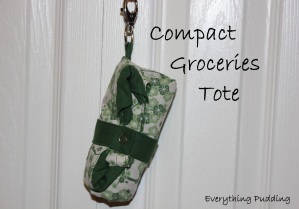
   Compact Groceries Tote-Find out more at Everything Pudding

It’s taking me an awful long time to post about the different projects I made as Christmas gifts. But eventually I’ll get through them all, though you may still be seeing a Christmas Wrap-up post in July (hopefully I’ll get them done before that though). This time I’ve got a Compact Groceries Tote that I sewed for one of my sisters to show you.

About six months ago I got Lisa Lam’s book, A Bag for All Reasons, at JoAnns. The book has 12 different bag patterns, several of which I’ve already got plans to make. The Compact Groceries Tote is the first bag that I’ve tried out of the book. It was really simple and the instructions and pictures were clear, so I had no trouble putting it together.

This bag uses three different fabrics, one each for the inside and outside of the bag and one fabric for the handle. Since I knew the recipient of this bag likes green I picked out three different green fabrics at JoAnns.

Fabric for Compact Groceries Tote

The only other materials needed was a snap set (had on hand) and a swivel hook. I couldn’t find one that met the dimensions described in the book but found this one at JoAnns which worked well.

The pattern pieces for the bags are included in the back of the book. However, because I didn’t want to cut into the paper for fear of losing the pattern pieces, I copied the one pattern piece I needed from the book for this bag onto lightweight interfacing. The other pattern pieces that I needed were just rectangles which the book gave dimensions for and I cut out of a brown paper sack.

Compact Groceries Tote ~ Everything PuddingCompact Groceries Tote Pattern Pieces

After I had all my pattern pieces cut out it was a simple matter of sewing it up. It was time consuming but it was really easy.

Compact Groceries Tote-Reversable! Find out more at everythingpudding.wordpress.com

The thing I really like about this tote is that it reversible and rolls up. It also has a little swivel hook which is meant to go on the outside so when rolled up you can hook it to something. However, if you put it on the inside (or turn your bag inside out, it’s reversible) you can clip your keys or something small to it.

Handy Swivel Hook lends a hand in the Compact Grocery Tote

It was an easy tote to make and really fun since I haven’t made very many bags. It’s perfect for a trip to the grocery store or a stop at the library. If you want to make your own Compact Groceries Tote you can do so by picking up your own copy of Lisa Lam’s book, A Bag for All Reasons, grabbing some fabric, and spending a couple hours at your sewing machine. Happy Sewing!

Compact Groceries Tote-Find out more at Everything Pudding

Project-Luggage Tags (Christmas Wrap-up #2)

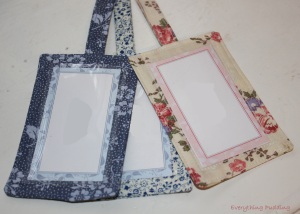
Luggage Tags-Find out more about how you make them and where you can get the pattern at the blog: Everything Pudding

Now it’s time for the second Christmas Wrap-up post. This year my sister and I each made something for our Mom’s stocking. She had said before that she’d like some luggage tags so I volunteered to make her some.

An elderly lady in our church had given us two large trash bags full of fabric remnants and scraps. We went through and ended up keeping one trash bag full of fabric we liked, we donated the rest. I looked in the bag and found three different cute fabrics that I used to make her luggage tags.

Luggage Tags-Find out more about how you make them and where you can get the pattern at the blog: Everything Pudding

Luggage tags are a great thing to make for a gift. You probably already have plenty of scraps you could use and they are super quick to make. I’d estimate that it takes about 30 minutes to make each one. You can speed up the process by making several at a time. While it’s a lot faster if you’re making them with the same fabric (so you can sew all of them at one time without worrying about changing thread) it’s still faster because you can cut them all out at the same time and fuse the interfacing.

So now that you know how quick and easy they are it’s time for you to make some. I used a tutorial from Skip to My Lou which you can find here. To read more about how made mine (including why I used page protectors for them) read my first post on luggage tags.

Tutorial-Grinch Pills and Snowman Poop (Christmas Wrap-up #1)

Grinch Pills and Snowman Poop-Free Tutorial and Printable from Everything Pudding

Wow, Christmas has come and gone super quickly. This year I made lots of handmade gifts. Now that Christmas is past I can share all about my projects without worrying about leaking classified information. I’ve got five or so posts to publish for all the different things I’ve made which you’ll be seeing in the coming week. As part of that I’ve also got some new tutorials for you, so keep watch. For now we’ll start with one of the really easy gifts I made this year, complete with a tutorial and printable.

I first came across the Grinch Pills and Snowman Poop while browsing Pinterest. I pinned them for later thinking I might use them. When it came time to shop and make gifts I pulled the ideas out for two of my family members.

These two are very easy gifts to make. Though this was not my original idea I ended up making my own labels because I couldn’t find what I needed. I also ended up using M&Ms instead of tic-tacs because I knew the gift recipients would like M&Ms better. So here’s a very simple tutorial (so simple I’m not sure I should even call it a tutorial, but I’ll do it anyway) and a printable I made just for you!

What You’ll Need:

 To Make It:

  1. Divide out the M&Ms by color into the Ziploc bags. You won’t be using the red ones so set those aside for another purpose or eat them. I used one bag’s share of green M&Ms for one bag of Grinch Pills and did the same for the Snowman Poop. You could also choose to put less in each bag so you need less M&Ms. Know, though, that depending on the bag, you might not get a lot of M&Ms of one color. The bag I used had twice as much red as it did white.
  2. Cut out your tags along the lines. Using double stick tape attach your tags to the cardstock. I had scraps of cardstock so I used different sizes for the snowman poop tag and the grinch pills tag. Make sure you have enough cardstock to fold over the bag and staple. The red cardstock below turned out to be a good size (approximately 4.5″ x 3.5″).
    Grinch Pills and Snowman Poop-Free Tutorial and Printable from Everything Pudding
  3. Fold the cardstock at the top so that the tag looks like it’s matted with similar margins on top and bottom. Fold the top of the snack bag over. Place the tag over and staple on both sides. (You’ll notice the green one is really wonky. That was my first try. You have to make sure that you hold the fold tight or else everything will move and it will end up wonky.)
    Grinch Pills and Snowman Poop-Free Tutorial and Printable from Everything PuddingGrinch Pills and Snowman Poop-Free Tutorial and Printable from Everything Pudding
  4. You’re done. Go give it to someone!

As always please use this tutorial for your personal use only. You may not copy the printable and post it on your own blog/site so instead please link back to my post.

Note: Inspiration and poem came from Pinterest. The clipart came from Microsoft Office Clipart Collection.