Recipe-Chocolate Scotcheroos

Chocolate Scotcheroos

Rice Krispies are a classic treat. Yet sometimes I have a craving for chocolate which Rice Krispies unfortunately do not satisfy. Luckily though, there is a solution: Chocolate Scotcheroos.

My sister first found this recipe online several years ago and we have made it a couples times. I wanted to make it again to use up the extra Crispy Rice we had (okay maybe I had a different motive, but that one sounds better). So I found the recipe in my cookbook and got going.

Butterscotch and Chocolate Chips

The thing that seemed to take the longest time was melting the chocolate and butterscotch chips. We use a double boiler when melting chocolate on the stove. It works well but takes forever. However after they were finally done and I had poured the chocolate on top I had to let them chill in the fridge to let the chocolate set.

Chocolate Scotcheroos

I was patient and after about an hour I cut them (not very straight, but who cares) and ate one. Ooh they are so good I really could have eaten several, but I didn’t. I replaced them back in the fridge (this is where we usually store ours) and waited ’til the next day to indulge myself.

Try them yourself by clicking here. Enjoy!
 

Recipe-Butterscotch Chewies

Butterscotch Chewies

Recently we had a covered dish supper with some families from our church. It was a small group and we wanted to make sure everything got covered: desserts, sides dishes, casseroles, etc. So my mom, older sister and I got in the kitchen and got busy. I volunteered to make dessert (the cook gets to taste test right?).

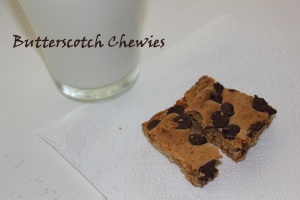
Being that I am not always in the mood for cookies and that we wanted something that would make a lot, I chose to make one of our favorite recipes: Butterscotch Chewies. I made two pans and since we served them on a plate, I got to taste test before hand.

The dessert was a hit, I think we only brought home 4 or 5 and with two pans we took almost 48. Sounds like it was a success.

To make your own follow the recipe below or click here to download the PDF: Butterscotch Chewies

Butterscotch Chewies

Ingredients:

½ cup butter
1 ½ cups brown sugar
2 eggs
1 teaspoon vanilla
1 ½ cups flour
1 teaspoon baking powder
½ cup nuts (optional)
semi-sweet chocolate chips

Method:

Melt butter in saucepan. Add brown sugar and bring to boil over medium heat, stirring constantly. Cool slightly. Add eggs one at a time and mix well. Add vanilla, flour, and baking powder. Stir in nuts. Grease 13 x 9 pan, and add batter. Sprinkle with chocolate chips. Bake at 350 degrees for 22-25 minutes. Cut when cool. Makes 24 bars.

Enjoy!

Recipe-Homemade Strawberry Nutri-Grain Bars

IMG_4312 - Copy

I”m a swimmer and swimmers eat lots of food, and I mean lots of food. I probably eat more meals/mini-meals/snacks than Hobbits (they eat 7). So when I’m going to a swim meet I make sure to take lots of snacks. Typically I take bars, chex mix, fruit, and lots of other stuff. Instead of buying bars this time I decided to try out some homemade bars.

Some of my favorite bars are the Nature’s Bakery Fig Bars. However they are expensive. My sister had pinned a recipe for Homemade Nutri-Grain Bars so I thought I’d try them and see if they were similar. They turned out great; everyone in my family liked them.

The recipe for the bars can be found here from Half-Baked Harvest. However, I didn’t follow her recipe exactly. She made her own filling. Since I’m lazy efficient I chose to use Strawberry Jam instead of making my own. I used about 3/4 cup per batch and I made two batches. Other than that I followed her recipe and my family wants them again. Sounds like it was a hit.

Unfortunately, mine didn’t turn out nearly as pretty as hers. As you can see from the picture below, taken right before I put them in the freezer to chill.

From Sarah's Phone 1 - Copy

However, after coming out of the oven they looked much better, still not perfect though.

IMG_4302

So now you have one more recipe to make and one less processed food you have to buy. Enjoy!

Recipe-Copycat Auntie Anne’s Nuggets

While shopping for clothes at our local mall recently, we stopped by Auntie Anne’s and picked up some Nuggets. They were absolutely amazing. They tasted just like the Auntie Anne’s Pretzels we’ve been making, except they were in nugget form.

This spurred a cooking day soon after in order to convert our pretzels to nuggets. Here’s how you do it:

Use this recipe and follow the instructions up to when you divide the dough. Instead of dividing the dough into 12 lumps roll it out into a rectangle roughly 8″ x 12″. Using a pizza cutter cut the dough into 48 pieces by cutting the it into 8 strips on the short side then cutting each strip into 6 pieces. Each “nugget” should be about 1″ x 2″.

Dip in the baking soda and water  mixture, place on a greased pan, and cook until the bottoms are a medium brown. Ours took about 6 minutes. Now dip in butter and enjoy!

Papercrafting-Snowflake Thank You Cards


Post Cover Photo
I always try to be prompt about writing thank you cards right after Christmas. I also like to make my own cards, not use bought ones. For thank you cards for this past Christmas I decided to get to work and make some shiny snowflake ones.

While I was prompt about making them I was obviously not prompt about posting this. However, I did think about posting it several times (and it’s the thought that counts), so please enjoy this 6 months late and get a head start for this Christmas.

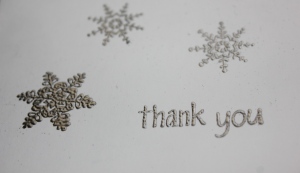
For all of my cards I used a set of plain white cards and envelopes from Hobby Lobby, an embossing heat tool, and silver embossing powder. I also used small pieces of dark blue paper for the two cards just below. I used two different thank you stamps and a variety of snowflake stamps.Thank You Card with Blue Background

I really like the combination of silver and dark blue so that was my focus on the card above and below.Thank You Card 1

However silver still looks nice on a plain white background.

Thank You Card 3

I used one large snowflake stamp and did it three different ways: landscape, portrait, and portrait with thank you at the bottom.

Thank You Card 2

I have to say that the card below is my absolute favorite. I used two different small snowflake stamps and randomly positioned them on the card.

Thank You Card 4

I hope you’ll try out making your own snowflake cards. The possibilities are endless.

Recipe-Mini Maple Pancake Muffins (Puffins)

I am not a cereal lover. I will eat Mac & Cheese for breakfast rather than cereal, however I do like breakfast foods such as muffins, pancakes, waffles, breakfast casseroles, etc. But unfortunately the breakfast foods I like take too much time to have every morning, especially on a Sunday morning.

Sunday mornings are busy, the normal morning routine of getting dressed becomes more time consuming when getting ready for church. Usually we have bagels, cereal, or whatever is on hand. This morning though we got up a little earlier and made some Mini Maple Pancake Muffins (or Puffins) from Bakerella.

They tasted just like chocolate chip pancakes and were so much easier. We made a double batch (one batch make 24 mini muffins) being that we have a larger family. We had plenty of batter for 48 (since we doubled it) and probably could have stretched it to make more since some were rather large. We did end up cooking ours for longer. The recipe says 8-9 minutes but ours needed 13 minutes. We’re looking forward to trying them out again with different mix-ins: blueberry, nuts and chocolate chips, the possibilities are endless. Hopefully you’ll try them to; click here to grab the recipe and start cooking.


Tutorial-Shoe Bags

IMG_2755 - Cover Photo #1

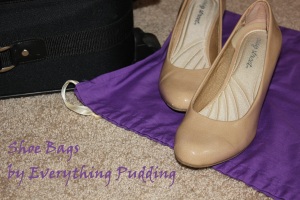
Shoes are something we can’t go without especially when traveling. However the fear that my nice shoes would get scuffed up while in the suitcase or that my tennis shoes would leave dirt on my clothes prompted me to used walmart bags for my shoes. However walmart bags are most certaintly not pretty. In order that I might protect my shoes in something pretty I made myself some shoe bags. And in order that you might protect your shoes in something pretty I made you a tutorial and am sharing it.IMG_2751 - Cover Photo #3

I have seen several different tutorials for shoe bags out there. They are what first gave me the idea to make some for myself. However none of them were exactly like I wanted, so I made my own.

I wanted a totally finished bag, meaning no exposed seams and thread. I also wanted a shoe bag with two “pockets”, that way the shoes wouldn’t mess each other up. I accomplished this by using french seams and sewing two seams down the middle of my bag creating the two “pockets”.

IMG_2724 - Cover Photo #2

The bags were so easy I made three, enough for all the pairs of shoes I needed to take on my trip for a speech and debate tournament.

So now it’s your turn. Pick out some fabric, grab a sewing machine, and download my tutorial to get started: Shoe Bags Tutorial by Everything Pudding.

Papercrafting-Bright Butterflies Quilled Card

IMG_3711

A sweet little girl we know wrote me a note recently. I wanted to respond with a cute card. After having taken a break from quilling for a long time I decided to pull out my books and find a cute design. So I found this card design “Bright Butterflies” in my book Quill It Easy.
IMG_3696

I modified it slightly from the book in order to fit what I had on hand but used pretty much the same color scheme. The dimensions of the card and green squares were different because I had a smaller card then the design called for. The only thing I wished I could of done which I didn’t do was to run the background paper through a crimper. This was in the original design and looks real nice but I don’t have a paper crimper.

As I mentioned this design came from a book Quill It Easy. This book has some real cute designs in it along with a couple pages on the basic materials needed and the basic shapes. I found mine at Hobby Lobby several year ago but I don’t think they carry it anymore. You can buy the e-book from the publisher here or order the print copy from amazon here.