Tutorial-Hot Chocolate Wallet (Christmas Wrap-up #5)

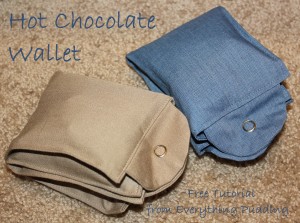
Hot Chocolate Wallet-A Free Tutorial from Everything Pudding, Use up your fabric scraps with this easy wallet that holds four hot chocolate mix packets and is perfect for travel or a camping trip

We’re down to the last Christmas Wrap-up post and this time I’ve got another free tutorial for you, a Hot Chocolate Wallet. This wallet is designed to hold 4 hot chocolate mix packets. You could use this when you’re going on a camping trip or visiting friends to ensure that you always have your favorite hot chocolate mix with you.

Hot Chocolate Wallet-A Free Tutorial from Everything Pudding, Use up your fabric scraps with this easy wallet that holds four hot chocolate mix packets and is perfect for travel or a camping trip

This is a really easy project to make and is great for using up small pieces of leftover fabric. I’ve already made three of these using leftover fabric so I’m starting to make a dent into my large stash. I made my first one in order to figure out whether the idea I had in my head would work out exactly as I thought it would. I picked this cute flower pattern to use for my first go and it worked out really well. I didn’t have to change anything when I went and made the next two that I gave as Christmas gifts.

Hot Chocolate Wallet-A Free Tutorial from Everything Pudding, Use up your fabric scraps with this easy wallet that holds four hot chocolate mix packets and is perfect for travel or a camping trip

So now it’s your turn. Download the tutorial here: Hot Chocolate Wallet Tutorial and start sewing!

As always, this tutorial is for personal use only. You may not reproduce this and you may not make items from this tutorial to sell. Thanks for respecting my hard work!

Tutorial-Grinch Pills and Snowman Poop (Christmas Wrap-up #1)

Grinch Pills and Snowman Poop-Free Tutorial and Printable from Everything Pudding

Wow, Christmas has come and gone super quickly. This year I made lots of handmade gifts. Now that Christmas is past I can share all about my projects without worrying about leaking classified information. I’ve got five or so posts to publish for all the different things I’ve made which you’ll be seeing in the coming week. As part of that I’ve also got some new tutorials for you, so keep watch. For now we’ll start with one of the really easy gifts I made this year, complete with a tutorial and printable.

I first came across the Grinch Pills and Snowman Poop while browsing Pinterest. I pinned them for later thinking I might use them. When it came time to shop and make gifts I pulled the ideas out for two of my family members.

These two are very easy gifts to make. Though this was not my original idea I ended up making my own labels because I couldn’t find what I needed. I also ended up using M&Ms instead of tic-tacs because I knew the gift recipients would like M&Ms better. So here’s a very simple tutorial (so simple I’m not sure I should even call it a tutorial, but I’ll do it anyway) and a printable I made just for you!

What You’ll Need:

 To Make It:

  1. Divide out the M&Ms by color into the Ziploc bags. You won’t be using the red ones so set those aside for another purpose or eat them. I used one bag’s share of green M&Ms for one bag of Grinch Pills and did the same for the Snowman Poop. You could also choose to put less in each bag so you need less M&Ms. Know, though, that depending on the bag, you might not get a lot of M&Ms of one color. The bag I used had twice as much red as it did white.
  2. Cut out your tags along the lines. Using double stick tape attach your tags to the cardstock. I had scraps of cardstock so I used different sizes for the snowman poop tag and the grinch pills tag. Make sure you have enough cardstock to fold over the bag and staple. The red cardstock below turned out to be a good size (approximately 4.5″ x 3.5″).
    Grinch Pills and Snowman Poop-Free Tutorial and Printable from Everything Pudding
  3. Fold the cardstock at the top so that the tag looks like it’s matted with similar margins on top and bottom. Fold the top of the snack bag over. Place the tag over and staple on both sides. (You’ll notice the green one is really wonky. That was my first try. You have to make sure that you hold the fold tight or else everything will move and it will end up wonky.)
    Grinch Pills and Snowman Poop-Free Tutorial and Printable from Everything PuddingGrinch Pills and Snowman Poop-Free Tutorial and Printable from Everything Pudding
  4. You’re done. Go give it to someone!

As always please use this tutorial for your personal use only. You may not copy the printable and post it on your own blog/site so instead please link back to my post.

Note: Inspiration and poem came from Pinterest. The clipart came from Microsoft Office Clipart Collection.

Unique Gift Wrapping II

I told y’all I would be doing more posts on unique gift wrapping and now here’s another one. This idea was actually my mom’s and I thought I’d share it.

We were giving a salad bowl as a gift for a bridal shower. The only problem is that it’s big and breakable so packing it in a gift bag would be difficult and it would be hard to use wrapping paper, so… we used a table cover. My mom picked up a pretty turquoise disposable table cover at Walmart for only $0.97 (cheaper than a gift bag!). She put the bowl in the middle and gathered it up and around the top, then used some ribbon to keep it gathered. Since the table cover was a little big she tucked some of the “fluff” back into the ribbon. It turned out looking really nice. (I wish I had a picture but I neglected to take one, oops!).

So the next time you have a large, oddly shaped gift to wrap pick up a colored table cover and start wrapping!

Unique Gift Wrapping I

As you can tell this gift was a Christmas gift. I know I’m a little late getting this out but I thought I’d share this idea with you. Obviously you could do this for any gift.

The gift was a mug with a coaster and some other things. We couldn’t wrap it using wrapping paper. A gift bag would’ve worked but I wanted something tight around it so everything wouldn’t move. Introducing my unique gift wrapping: Food and Bread Storage Bags.

They are great for this purpose. They were just the right size too. I stuffed two layers of the pretty Christmas tissue paper down the bag and sort of arranged it. I was in a hurry and didn’t mess with it that much. The wrapping wasn’t super neat but I thought it looked great. I finished it off with red ribbon and a gift tag.

If you wonder where I got those pretty gift tags, well unfortunately they aren’t the result of my talent. I found these gift tags from Decorator’s Notebook via Pinterest. There are 16 different hand drawn gift tags on a sheet. You can print out your own here.

Now you know what to use when needing a gift bag: a Food and Bread Storage Bag.

This is my first post in a series: Unique Gift Wrapping. Enjoy using this neat idea.